Welcome to our comprehensive guide on utilizing Nebulox, your crypto payment gateway to hassle-free cryptocurrency transactions. In this blog post, we will walk you through the essential features and functionalities of Nebulox, helping you navigate the various sections of our website with ease. Whether you’re a seasoned crypto enthusiast or just dipping your toes into the world of digital currencies, Nebulox is here to simplify your payment experience. Let’s delve into how you can harness the power of Nebulox and unlock the potential of seamless transactions.
Registration
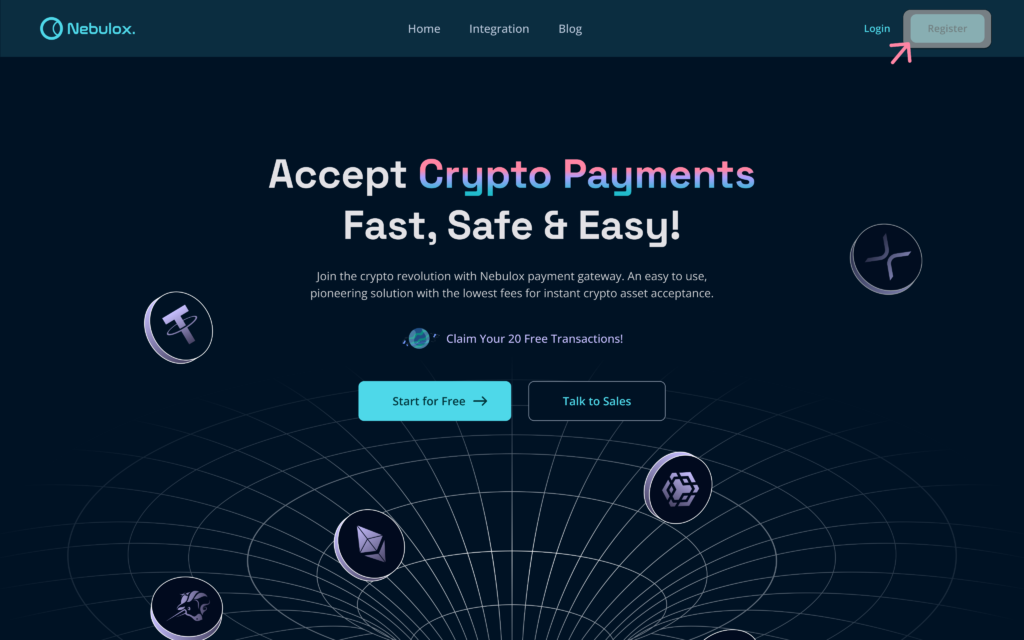
In your browser’s address bar, input Nebulox.io. Once the website loads, from the header, find the “Register” button and give it a click.
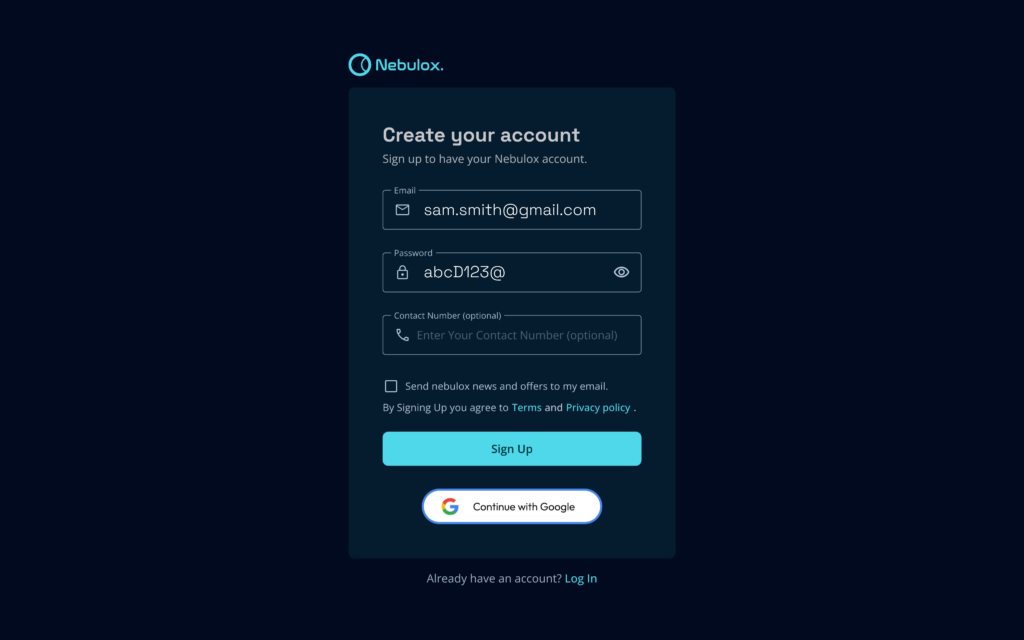
Once you’ve been directed to the registration page, proceed by completing the provided form. Input your email address and select a secure password, keeping in mind that providing your phone number is “optional”. Your chosen password must meet certain criteria, including the inclusion of at least one lowercase and one uppercase letter, as well as one numeric digit and one special character. Additionally, the password should consist of a minimum of 8 characters. Should you wish to receive newsletters and stay informed about the latest updates via email, ensure to mark the designated checkbox. It’s essential to carefully review the terms and conditions, as well as the privacy policy, before finalizing the process by clicking the “Sign Up” button. Alternatively, the option to register through your Google account is also available. By following these steps meticulously, you pave the way for a seamless initiation into the Nebulox platform, where secure and efficient cryptocurrency transactions await.
Embrace the Future of Finance: Let the Crypto Payment Gateway Propel Your Business Forward
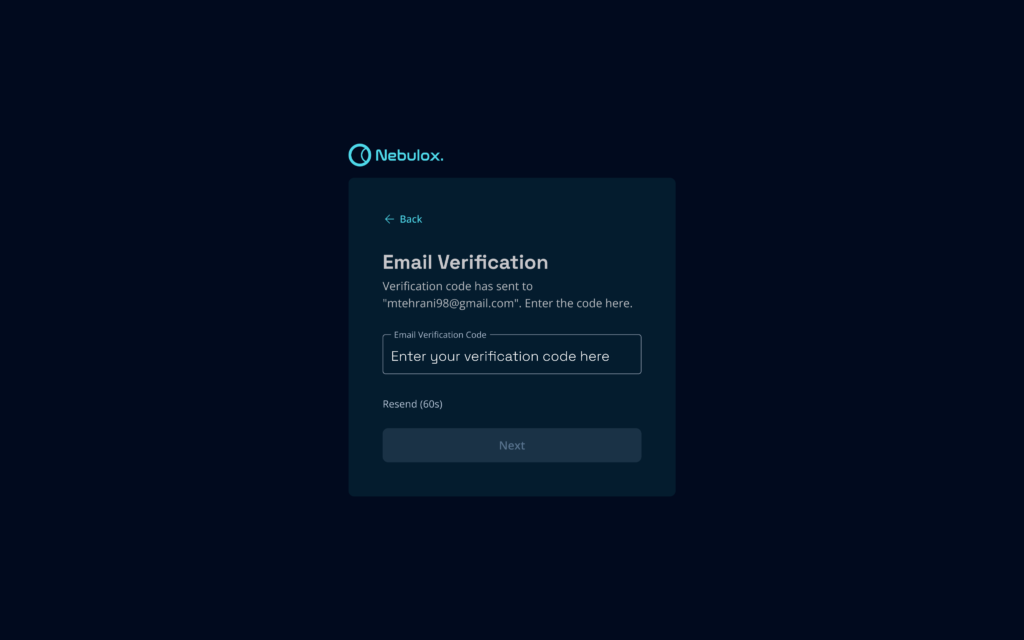
Upon entering your email, a verification code will be dispatched to the provided address. Proceed by copying this code and pasting it into the designated input field on the verification page. Conclude the process by clicking on the “Verify Email” button.
Once you successfully log in using your email and password, you will be directed to the dashboard.
Create Gateway and Get API Key
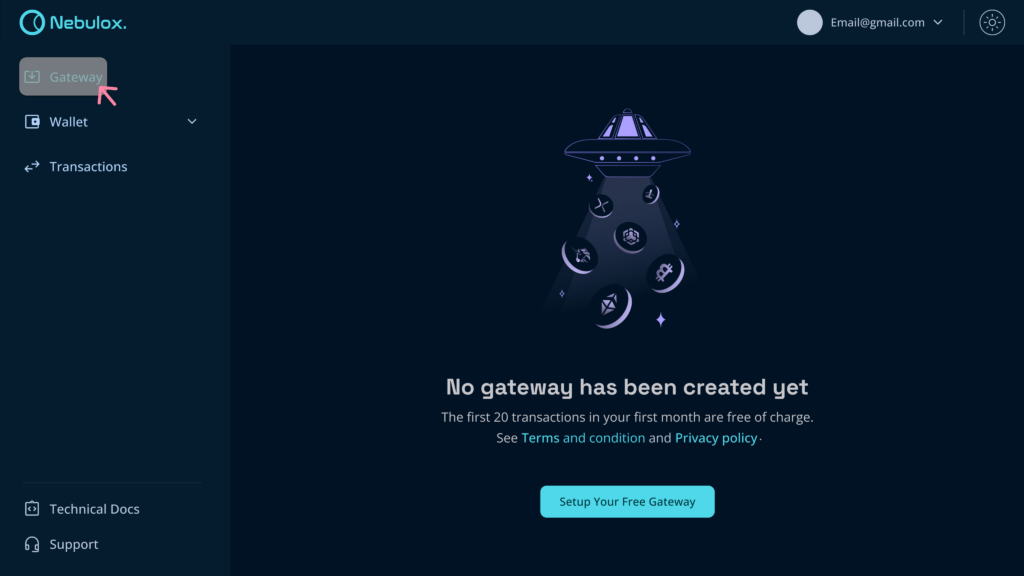
Within your dashboard, navigate to the “Gateway” option located in the side menu. Proceed to select the “Setup Your Free Gateway” button.
Furnish the Essential Details Required for Setting up a Gateway:
- Enter your Business Name and Website URL.
- Specify the Payment Expiration Time (each invoice will expire after this duration).
- Input the Webhook URL (this will be utilized to notify about payment statuses).
- Optionally, incorporate your business logo to be displayed on the gateway invoices.

Generate Invoices and Dispatch Them to Your Clientele in Mere Moments, All Without the Need for Any Coding Expertise.
Select the “Create Gateway” option, upon which a dialog box will emerge displaying your unique API key. This distinctive key is intended for APIs and integrations. It’s important to note that you’ll only have a single chance to view it, so ensure to securely store a copy. Should you misplace it, the option to regenerate the key is available.

Your initial gateway has been successfully established, and you can locate it within the list of gateways. To access further details, simply click on “Details,” where you’ll find additional information pertaining to the gateway.
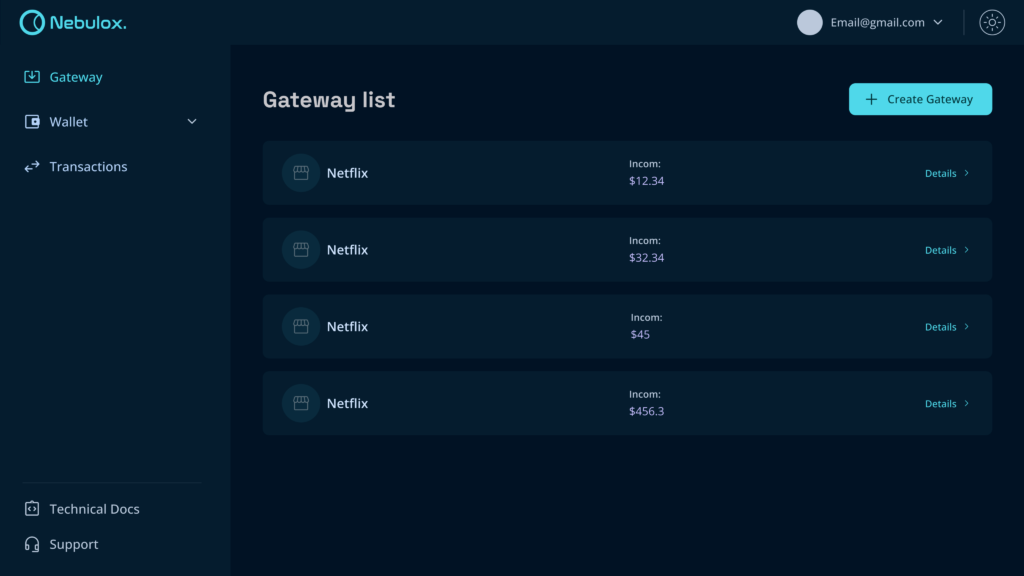
On this page, you have the option to modify details, observe the comprehensive balance of the gateway both collectively and for each individual asset, or deactivate the gateway if needed.
On this page, you have the option to modify details, observe the comprehensive balance of the gateway both collectively and for each individual asset, or deactivate the gateway if needed.
Wallet Management
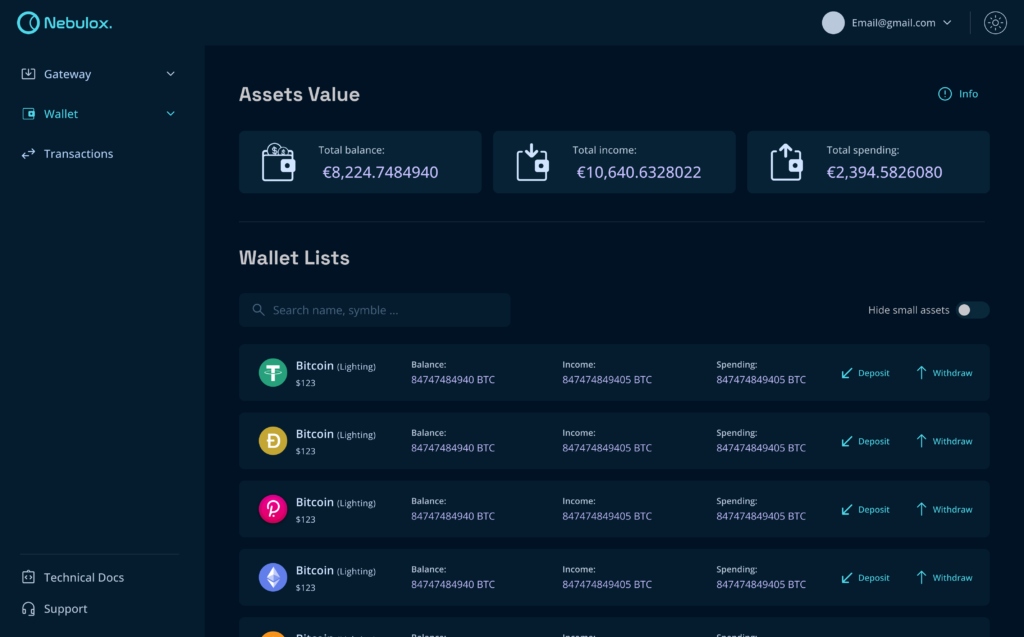
Navigate to the wallet section by selecting it from the side menu. Here, you have the ability to oversee your custodial wallet. At the page’s upper section, you’ll find an overview of the present balance, as well as the cumulative amounts for deposits and withdrawals. For every asset, be it a Coin or Token, two options are made available: Deposit and Withdraw.
Deposit to Your Wallet
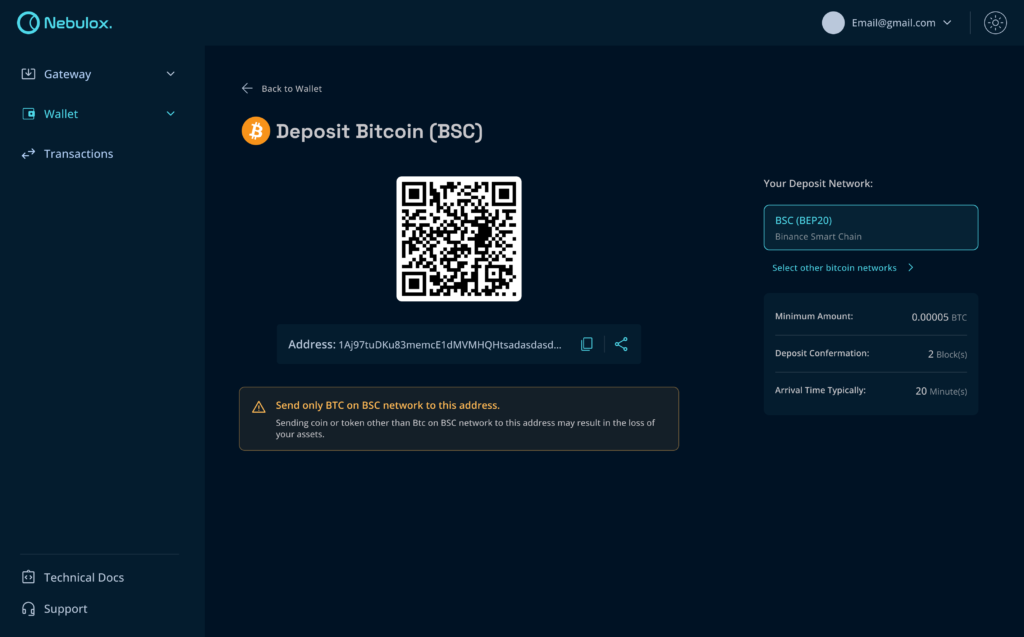
Within the roster of wallets, opt for the deposit feature corresponding to a particular asset. This will lead you to a page displaying essential details such as the token and network, along with a QR code and the address to execute the payment from an alternate wallet.
Withdraw From Your Wallet
Within the compilation of wallets, select the withdraw feature associated with a distinct asset. This action will prompt a page where you can input the desired amount, along with the destination address of another wallet for the withdrawal of that specific asset from this wallet.
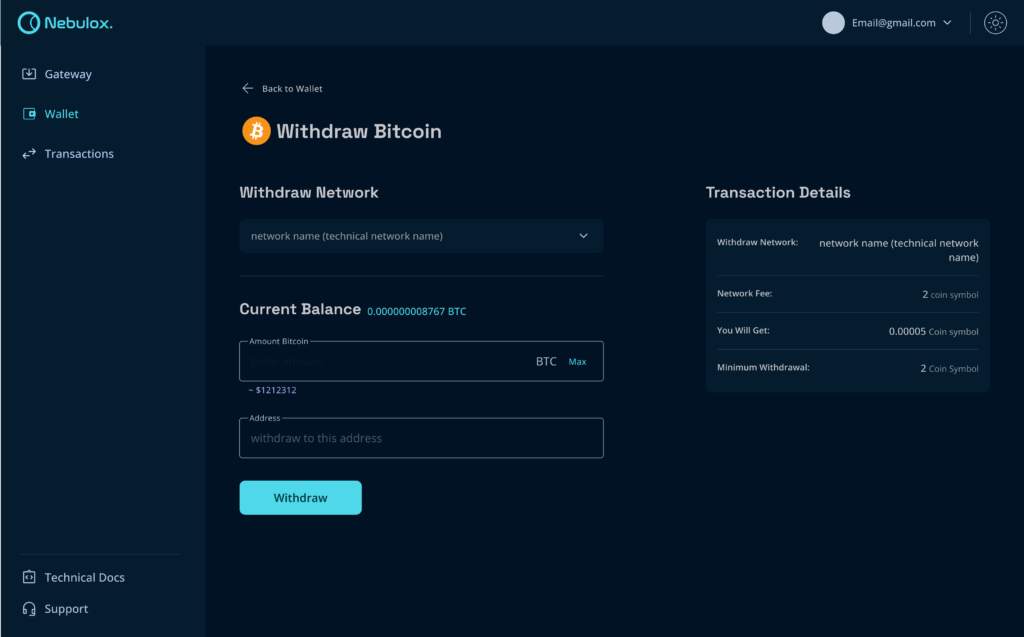
Upon clicking the Withdraw button, a verification code dialog box will appear. Insert the code that has been sent to your email, and then proceed by clicking the verify button.
Transactions List
Within this section, you have the capability to peruse a comprehensive catalog encompassing all transactions, spanning both deposit and withdrawal categories. By selecting individual TX IDs, you will be seamlessly redirected to the corresponding blockchain explorer, granting you the ability to monitor the status of each transaction
Conclusion
In conclusion, delving into the intricacies of Nebulox through our comprehensive guide offers a gateway to unlocking a world of streamlined transactions, secure payments, and unprecedented convenience. As you embark on this journey, you’re equipped with the tools to optimize your business operations, explore the benefits of crypto payment gateways, and tap into new opportunities within the digital realm. With each step mastered, you’re poised to harness the full potential of Nebulox and propel your business towards greater heights. Welcome to a future of seamless financial interactions and innovative possibilities.